Postinstall Configuration of Proxmox VE 6.2
Postinstall Configuration of Proxmox VE 6.2
Contributed by @Not_Oles -- July 6, 2020
Introduction
Our goal is to become a Low End Hosting Provider by selling virtual private servers (VPSes) created with Proxmox on an inexpensive bare metal host server rented from SoYouStart.
In the first post in this series we successfully installed Proxmox Virtual Environment ("PVE"), Version 6.2 on a Low End SoYouStart server.
In this post, using the Proxmox web Graphical User Interface (GUI), as well as the traditional command line environment, we will accomplish postinstall steps, including:
- Initial Login,
- Obtaining a Let's Encrypt Secure Sockets Layer (SSL) certificate,
- Setting up the firewall,
- Adding firewall rules,
- Enabling firewall rules and also the firewall itself,
- Checking the firewall for proper operation,
- Updating and upgrading both Proxmox itself as well as the Debian GNU/Linux base system on which Proxmox 6.2 runs, and
- Additional ssh and web GUI security considerations.
The postinstall steps covered here are not specific to SoYouStart and, instead, are very much the same with other bare metal host server providers. So, this post could be used as a postinstall configuration guide for Proxmox installations on servers from other vendors besides SoYouStart.
Initial Login
Let's check the OVH email congratulating us on our successful install. Look within the email for "Application Access Parameters," which gives us a link to point our browser at the Proxmox web GUI and as well as our username, root, and root's password. Note that the link has "8006" in it because the web GUI runs on port 8006. If, using Chrome broswer, we click the link or paste it into our URL bar, the first thing we should see is the insecure connection block, which, looks like this:
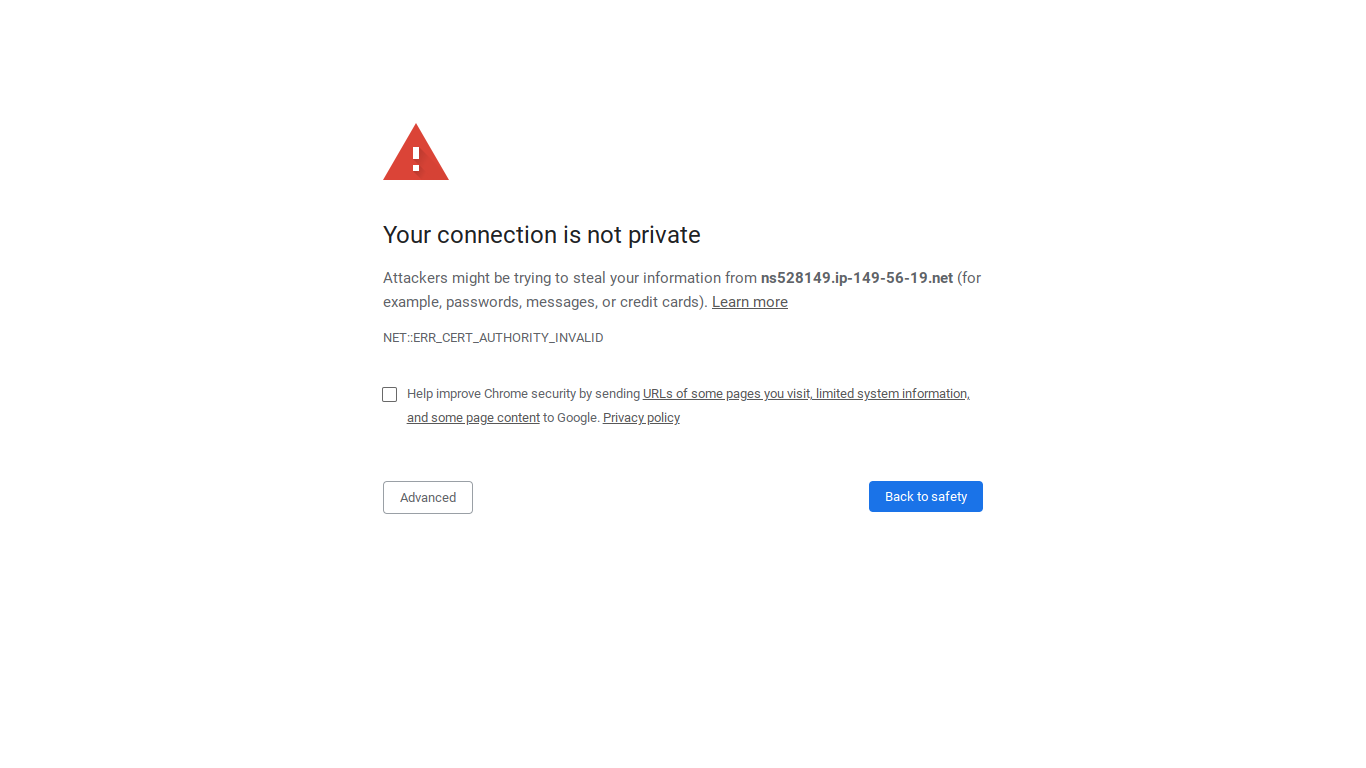
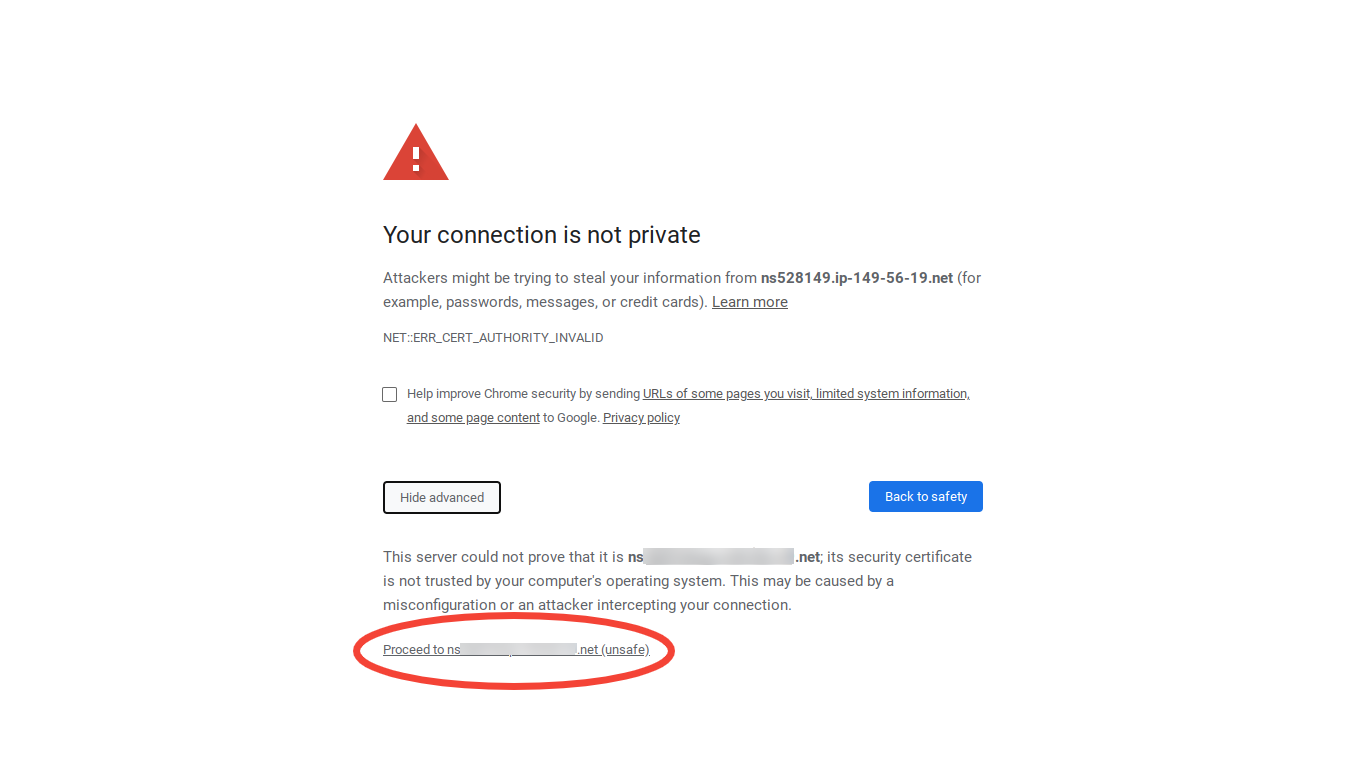
Note that the connection actually is encrypted. It isn't really "insecure," except in the sense that Chrome does not recognize our server's certificate as valid. To access the Control Panel the block needs to be overridden, so let's click "Advanced," and then "Proceed to [the link from the email] (unsafe):"
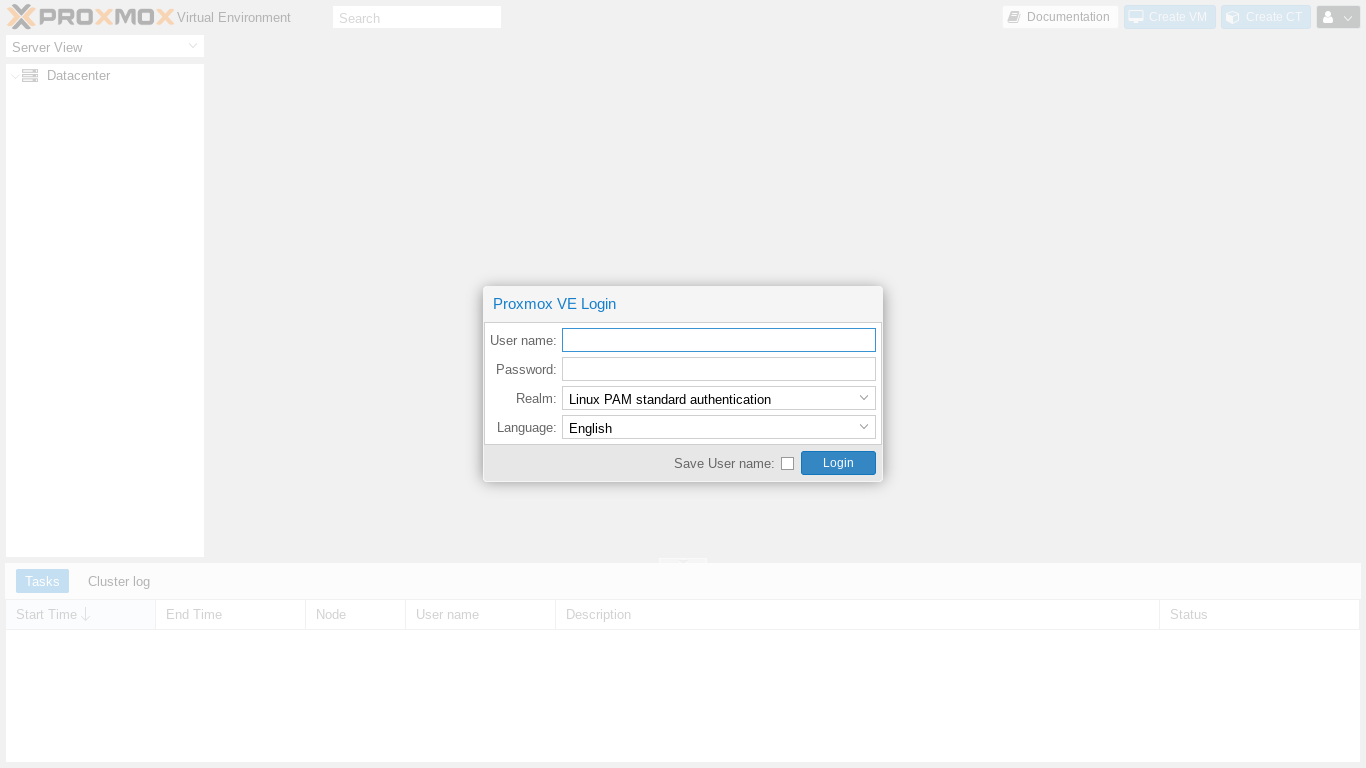
We now should see the Proxmox web GUI login screen where we can enter root as our username and our password from the OVH emai and click "Login:"
Next we should see the Proxmox Nag popup:
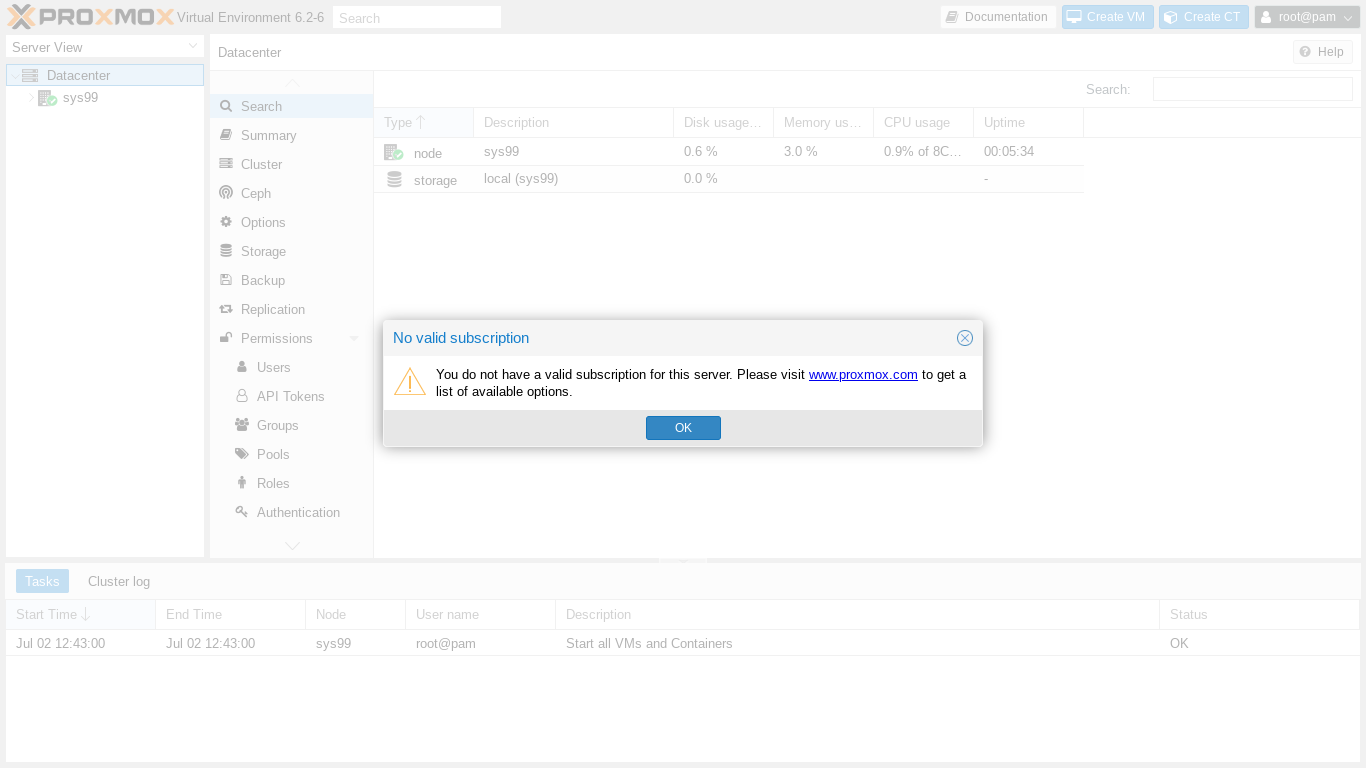
Let's please consider buying a subscription to support the Proxmox team. Then we'll click OK.
Finally, we are ready to use the Proxmox web GUI.
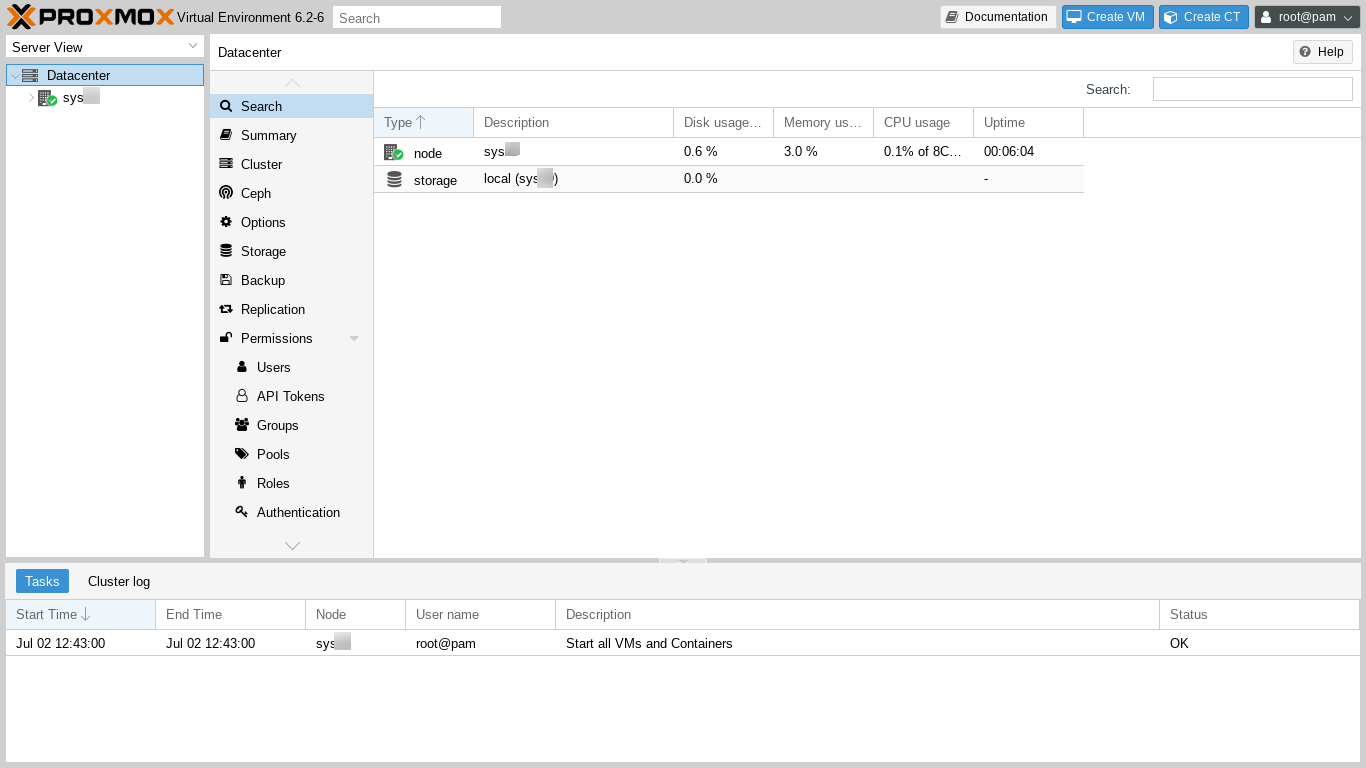
The Control Panel layout features include:
- a Server View in the left hand column listing all the servers in the Datacenter. As this is our first server, it is the only server listed.
- The Top Bar, which tells us the version of Proxmox Virtual Environment, here 6.2-6, and provides a searchbox plus buttons to create a KVM VPS, create an LXC VPS, and to access root user account functions (Settings, Password, Two Factor Authentication (TFA), Language, and Logout).
- The main panel, which here contains information about the Datacenter, including a list of nodes (each server is called a "node") and a Help button in the upper right. The left hand column of the main panel contains a long list of categories, one of which is "Firewall," which we need to scroll down the menu in order to see.
- Recent Log entries are shown at the bottom of the main panel. We see that the zero currently existing VPSes were started without any failure.
We can click and drag the borders of the Control Panel layout sections to resize them as convenient.
Obtaining a Let's Encrypt SSL certificate
Ordinarily, the very first thing to do after installing a new server might be to secure the server by limiting access through the firewall, further adjusting ssh access, installing fail2ban, etc. However, these steps, as done below, do block Let's Encrypt's ability to issue the server certificate. To make issuing the certificate easier, let's get the certificate issued before setting up the firewall. Getting the certificate will only take a moment.
In order to get the certificate, you need to have registered a domain name such as superspeedyvps-example.com, pointed the domain's DNS records at the server's numerical IP address given in OVH's access email, and set up whatever email you want to use to receive notices from Let's Encrypt.
There is one additional preliminary tip to make using our new certificate easier after we get it. Initially we logged in to the Control Panel using the OVH supplied URL from the access letter. If, prior to certificate issuance, we login to the Control Panel using our own superspeedyvps-example.com domain, then issue the certificate, then login again, it seems to take Chrome a few days to stop putting up the unsecured connection block despite that Chrome seems immediately to recognize the newly issued certificate's validity. Therefore, let's briefly continue using the OVH supplied URL and not point Chrome at our superspeedyvps-example.com domain until after the Let's Encrypt certificate is issued.
In the left hand Server View column, let's click on our server's name and, in the center panel's left column, scroll down if necessary, and also click on "Certificates." We should see this:
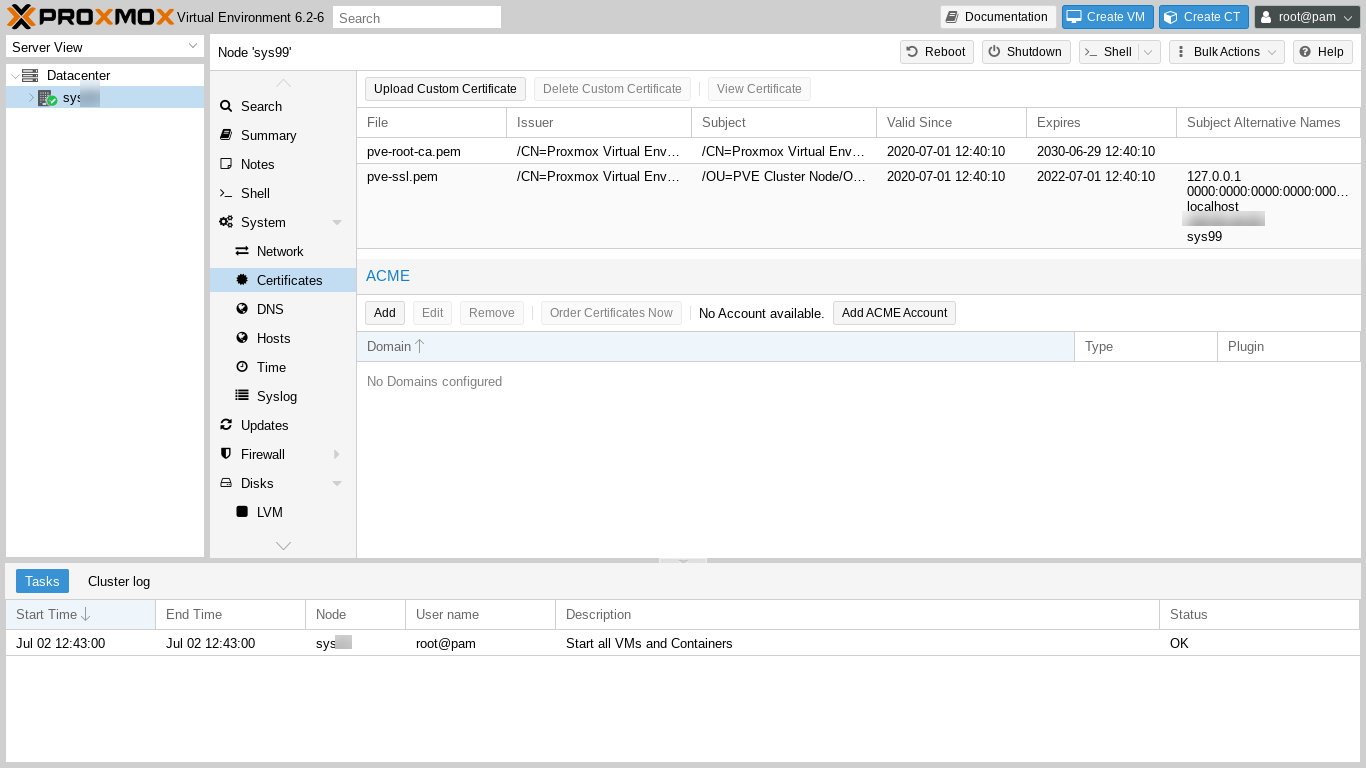
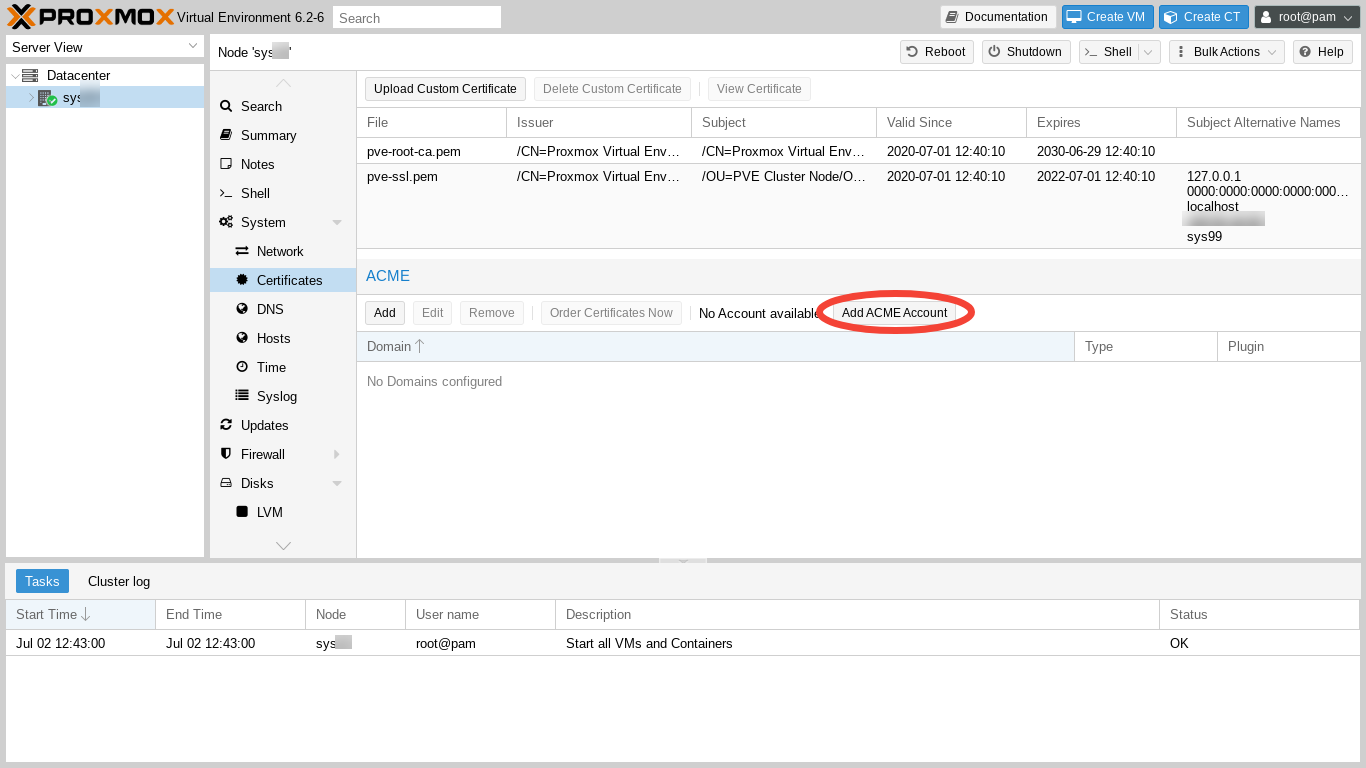
Next, we need to add our account in order to issue a certificate via the Automated Certificate Management Environment (ACME) We click on "Add ACME Account."
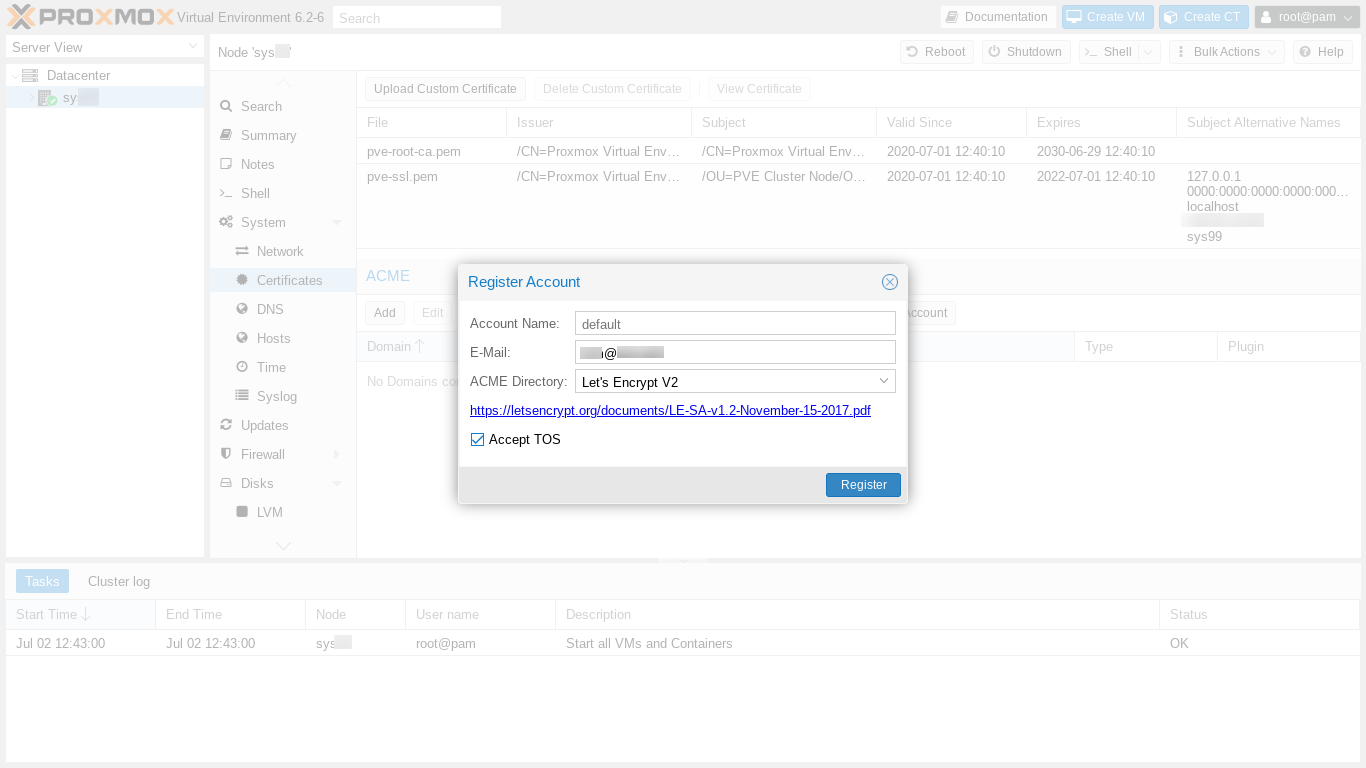
Next, we add our email address, carefully review the Terms of Service (TOS), check the "Accept TOS" box, and click "Register."
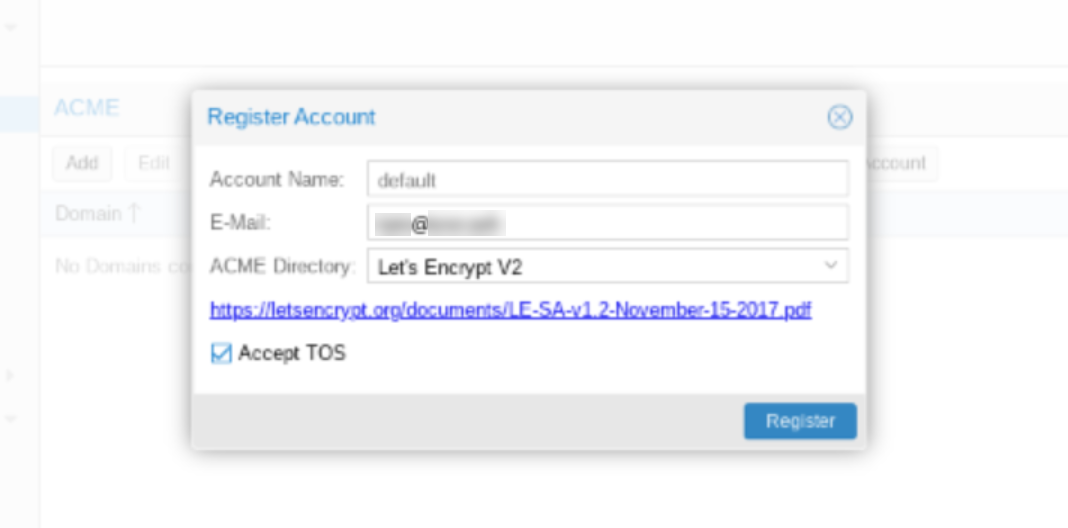
We see the account registration output and also that the registration task succeeded.
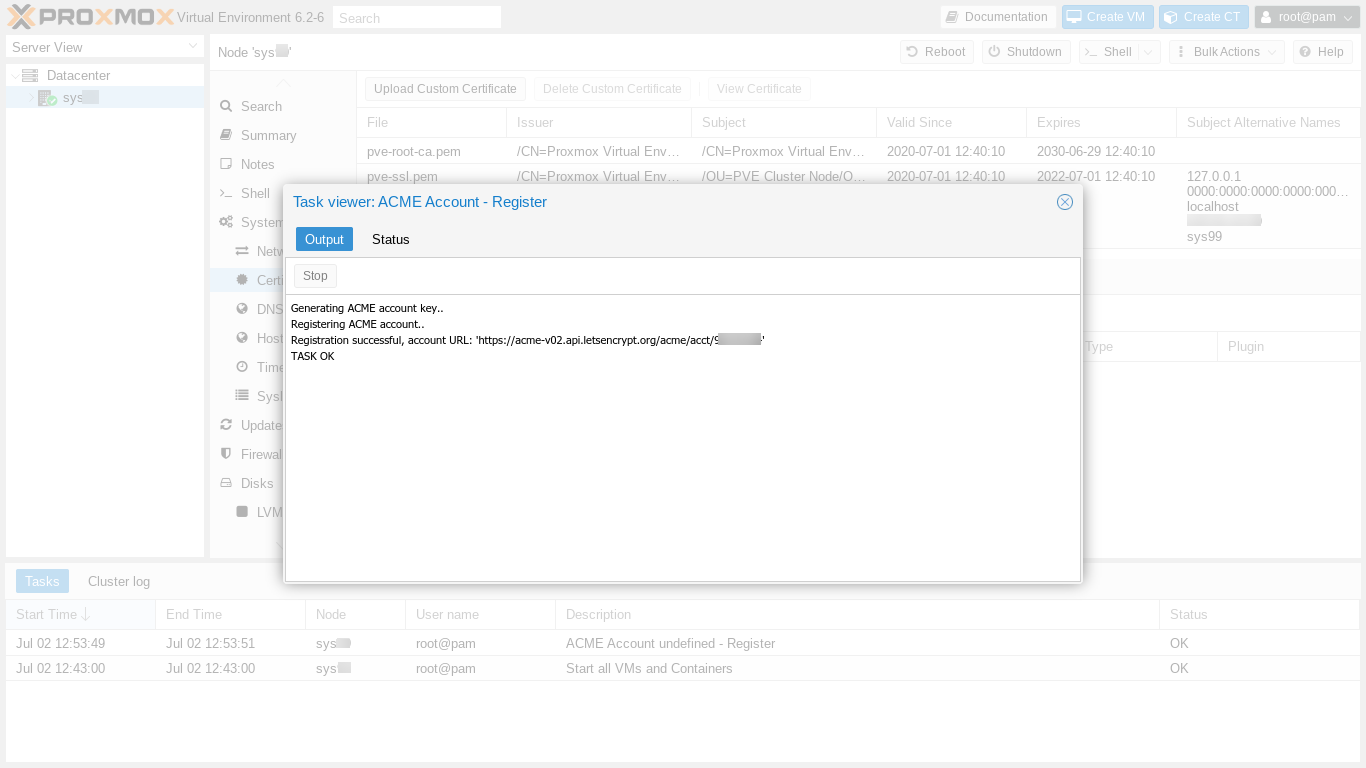
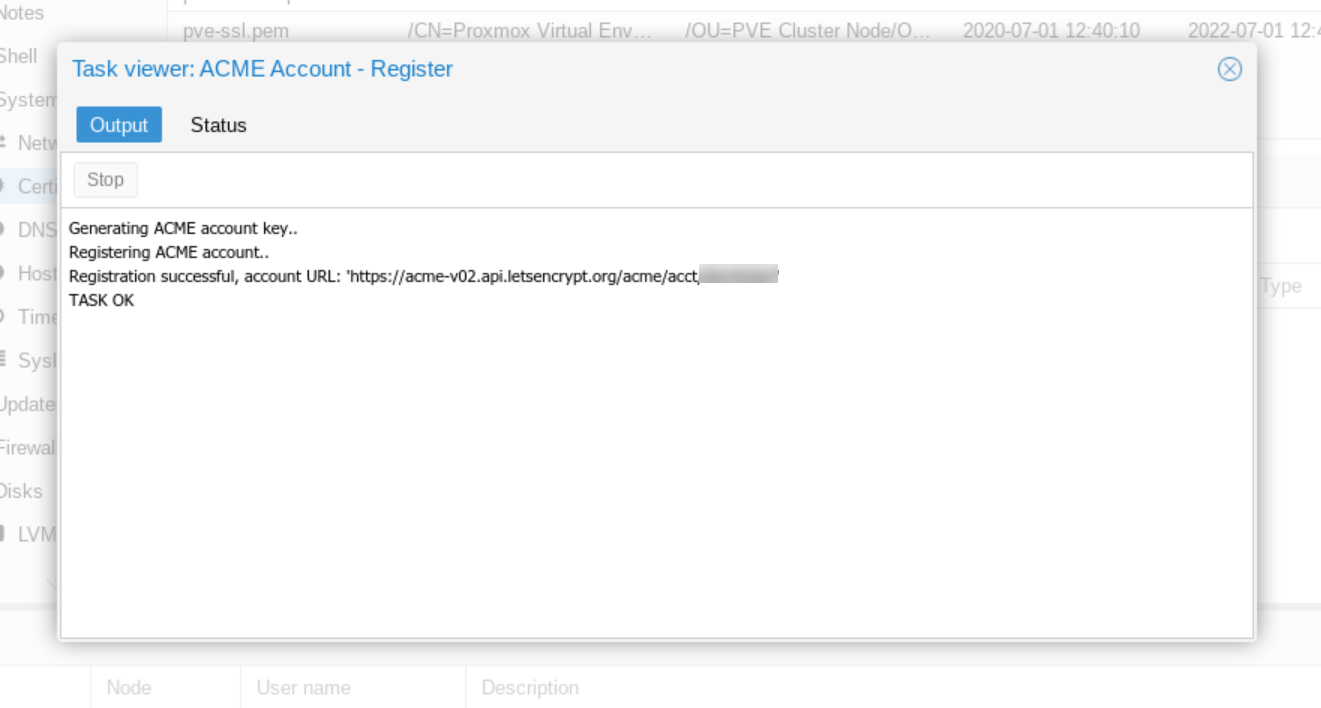
Next we close the account registration output window and click "Add" in order to add our certificate. The Create Domain dialog box appears.
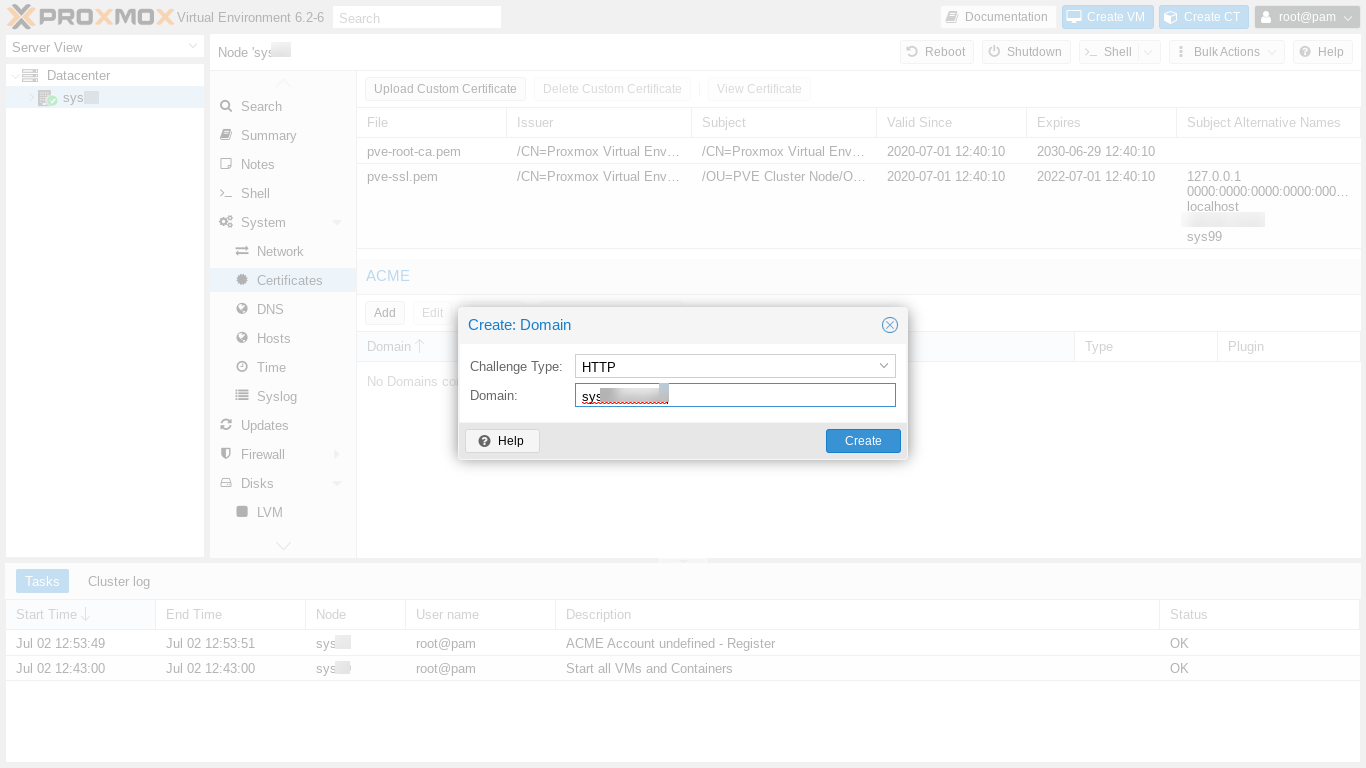
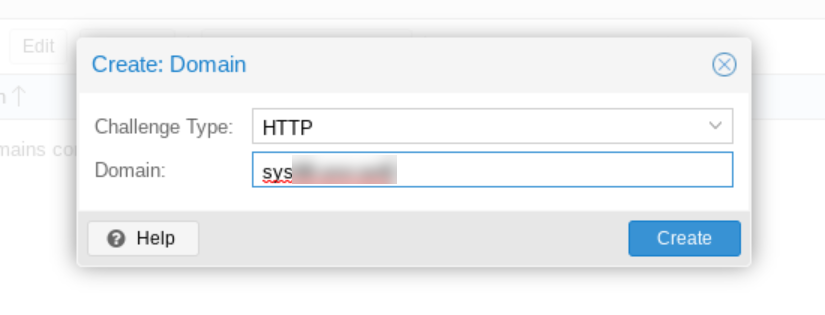
After clicking "Create," we click on our domain now newly appearing in the main panel's ACME domain list. Then, to get our certificate issued, we click on "Order Certificate Now." A pop up window appears, showing the output of the certificate ordering process. The process takes a minute or so, and ends with "Task OK."
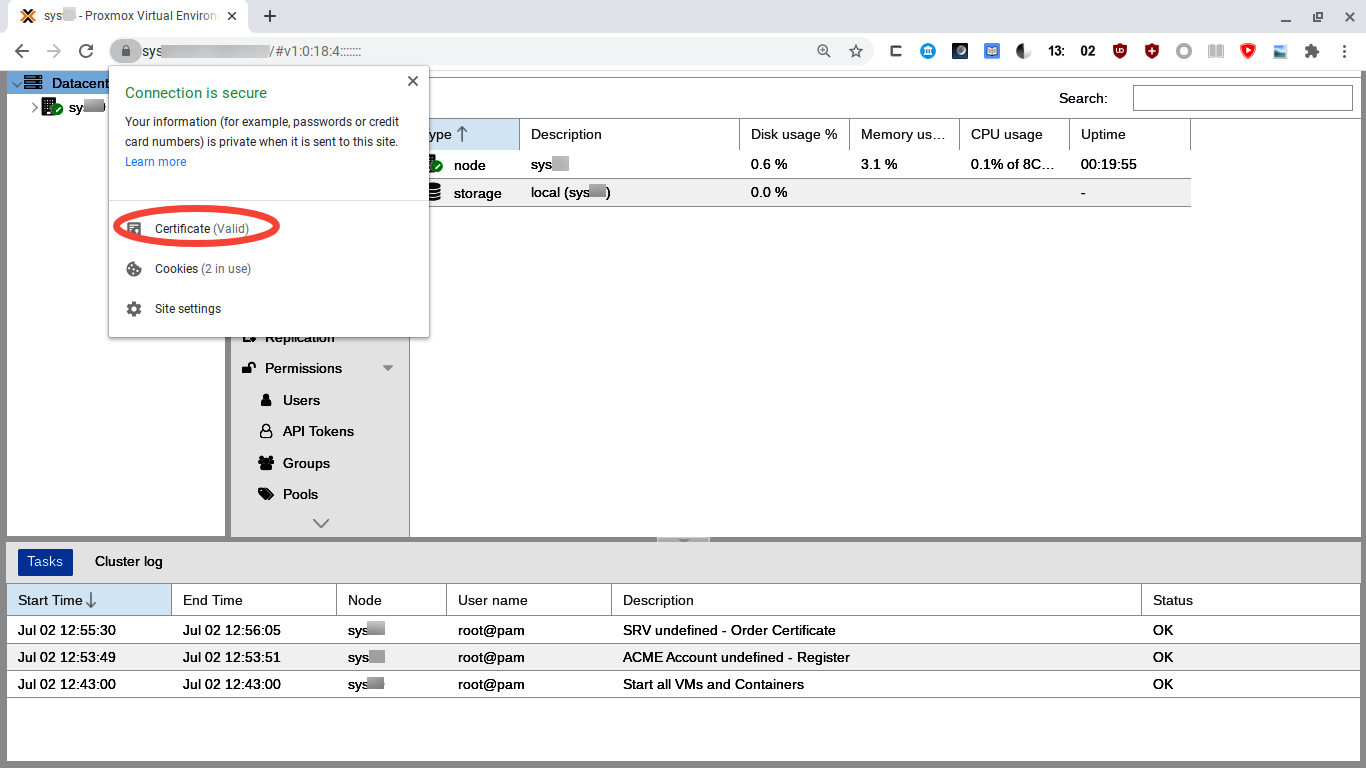
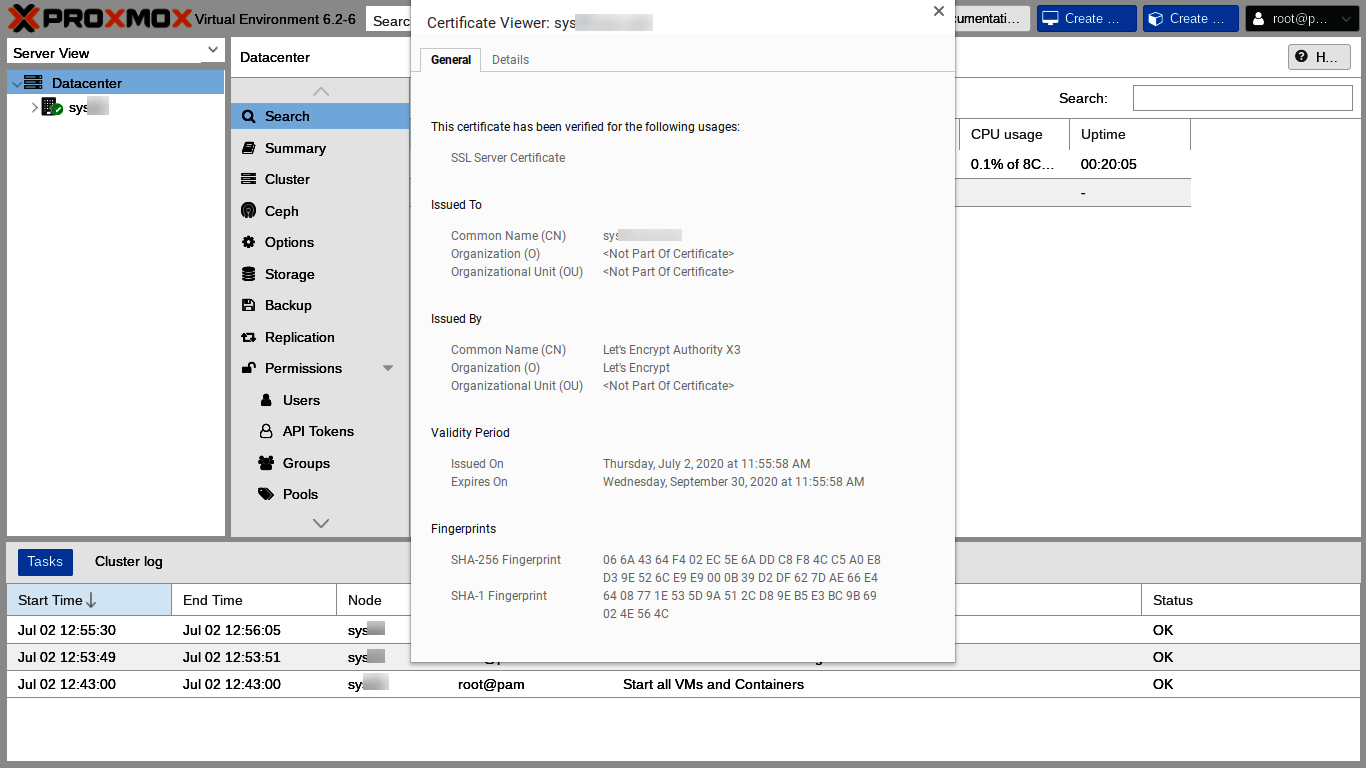
The Chrome security block soon reappears because the certificate has changed. We can just close our tab and then reload the web GUI in a new tab, this time entering our own registered domain, superspeedyvps-example.com, into the browser URL bar. We have to log in again and we have another opportunity to see the Nag. We can click the lock icon in Chrome's URL bar and then "Certificate" to see our new certificate's details.
Setting Up the Firewall
The Proxmox firewall currently seems to use iptables-legacy. We can check our server this way:
# ls -al /etc/alternatives/iptables
lrwxrwxrwx 1 root root 25 Jul  2 19:40 /etc/alternatives/iptables -> /usr/sbin/iptables-legacy
#
The Proxmox firewall is disabled on a new install. When the firewall is enabled, the default firewall configuration is to block all but ports 8006 and 22 on the local network, so if we are connecting from the internet, we shouldn't enable the firewall itself until after wide area internet access rules are added and enabled. The Proxmox Firewall Instructions emphasize this warning:
The firewall is completely disabled by default, so you need to set the enable option [ . . . ]
Important If you enable the firewall, traffic to all hosts is blocked by default. Only exceptions is WebGUI(8006) and ssh(22) from your local network.
If you want to administrate your Proxmox VE hosts from remote, you need to create rules to allow traffic from those remote IPs to the web GUI (port 8006). You may also want to allow ssh (port 22), and maybe SPICE (port 3128).
Firewall changes do not affect connections previously made, so, as insurance, Proxmox advises:
Tip: Please open a SSH connection to one of your Proxmox VE hosts before enabling the firewall. That way you still have access to the host if something goes wrong.
Adding Firewall Rules
We are going to add firewall rules allowing web GUI and ssh access from our primary IP address and from a backup IP address so that our ability to use our primary IP address is not a single point of possible failure. We'll also add rules to allow the host to respond to ping and traceroute.
Here is how to add the rules using the Proxmox web GUI. First, we select our server in the Server View column. Second, we scroll down and select Firewall in the menu on the left side of the main panel:
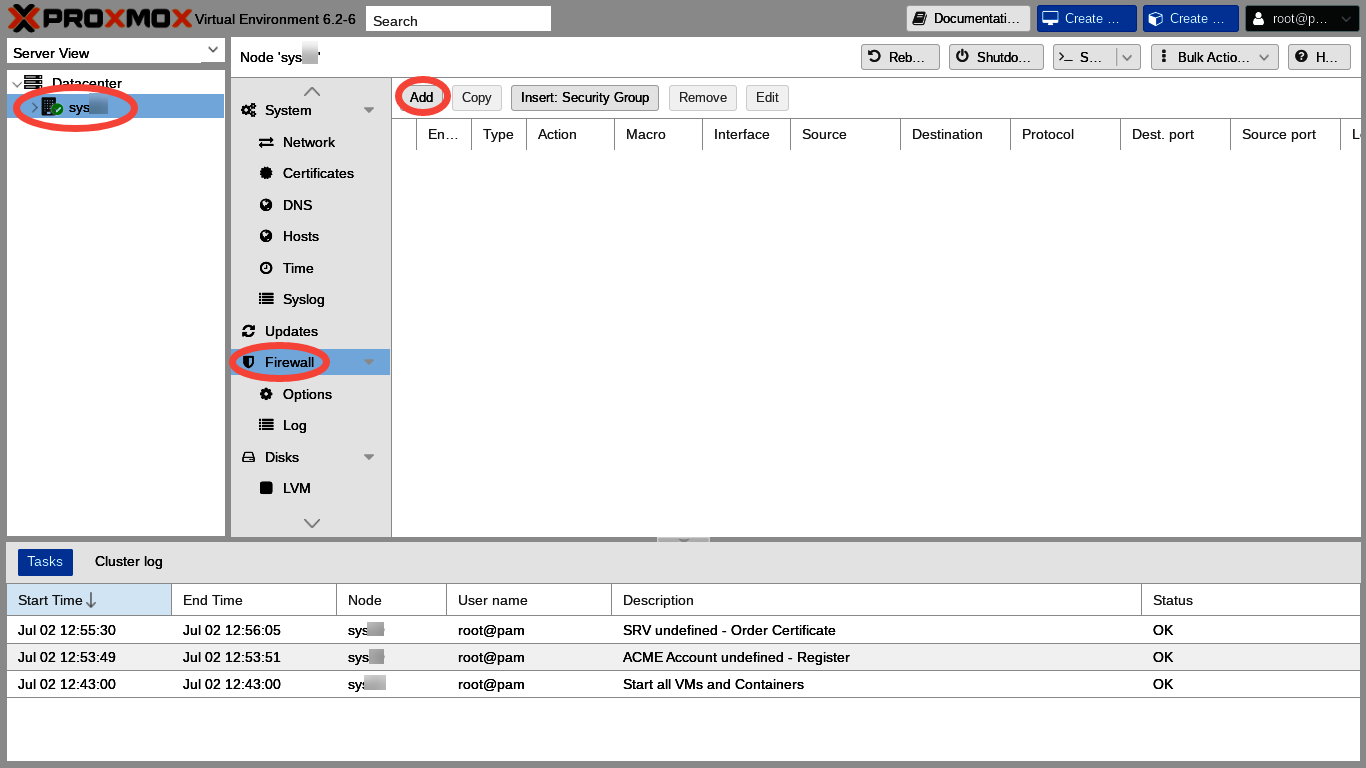
Third, we click the "Add" button, and the Add Rule dialog appears:
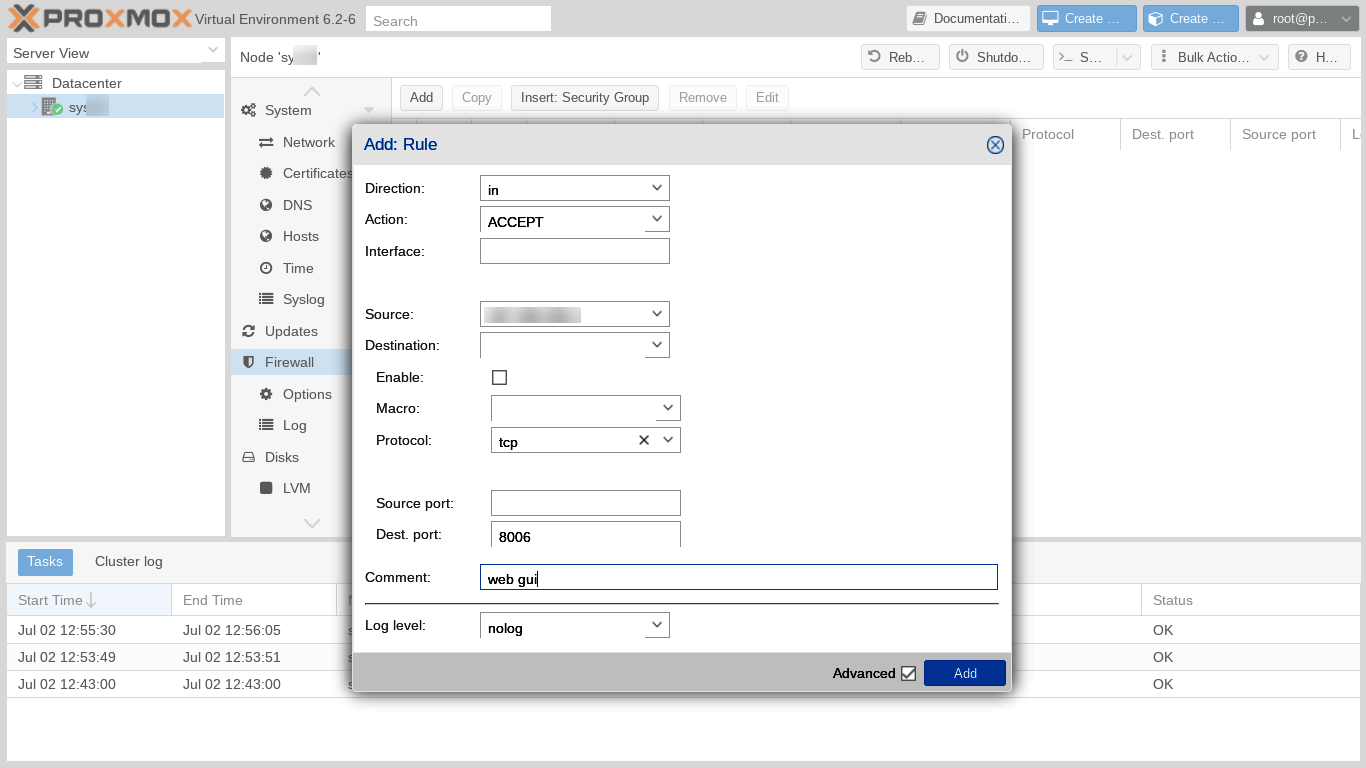
The first rule is to accept incoming connections from our primary IP address on port 8006 and using TCP protocol. Let's not check the enable box at this time because, lest we get locked out, we want to add additional access rules before enabling. After entering each rule, let's click Add in the Add Rule box, then click Add on the Firewall main panel to relaunch the Add Rule dialog to enter our next rule. A list of all the rules we are adding looks like this:
| Enabled | Type | Action | Source | Protocol | Destination Port | Log Level | Comment |
|---|---|---|---|---|---|---|---|
| No | in | ALLOW | Primary IP | tcp | 8006 | nolog | web GUI |
| No | in | ALLOW | Primary IP | tcp | 22 | nolog | ssh |
| No | in | ALLOW | Backup IP | tcp | 8006 | nolog | web GUI |
| No | in | ALLOW | Backup IP | tcp | 22 | nolog | ssh |
| No | in | ALLOW | icmp | nolog | ping | ||
| No | in | ALLOW | udp | 33434:44534 | nolog | traceroute |
If we are connecting from a dynamic IP, we can enter a rule allowing connections from a limited range of IP addresses using CIDR notation. For example, if only the last octet of our IP address changes, the source IP in the rule could be something like 123.123.123.0/24. An alternative to widening the connection rule is connecting from our dynamic IP through an intermediate fixed-IP VPS. Here, the IP of the intermediate VPS would entered into the rule.
After we have set all the rules, it's important for us carefully to triple check to make sure each rule is exactly, exactly, exactly right. ![]() A typo can lock us out! So, let's check all the rules one more time.
A typo can lock us out! So, let's check all the rules one more time.
Enabling and disabling firewall rules and also the firewall itself
Proxmox allows us, as sometimes might be very convenient, quickly and easily to disable individual firewall rules, the entire firewall for an individual host server node, or even all the firewalls for the entire datacenter. Therefore, in order to enable our firewall rules, we need to enable each individual rule, the host server node firewall, and the Datacenter firewall.
First, we need to click the enable checkbox next to the beginning of each individual rule.
Second, we need to make sure that the host server node's firewall is on. Click on "Options," right under "Firewall" on the left column menu of the main panel. Verify that "Firewall," the first option shown on the list, is set to "Yes."
Third, to enable the firewall at the Datacenter level, we click on "Datacenter" in the far left Server View menu, then click on "Options" just under "Firewall" on the left column menu of the main panel. We need to change "Firewall," the first option shown on the list, from "No" to "Yes."
Now the firewall should be operational.
Checking the firewall for proper operation
Next, let's check to make sure the firewall actually is working as expected.
First, we can open a terminal on the host server node. Just being able to open the terminal shows that we are allowed access from our IP address. In the terminal, we can see whether each of our new rules appears when we run
# iptables -L PVEFW-HOST-IN
Second, we should try connecting from various IPs which should be disallowed as well as from the IPs for which we set specific ALLOW rules.
Updating and upgrading Proxmox and Debian
Our next step is to update and upgrade both Proxmox Virtual Environment and also the underlying Debian GNU/Linux operating system so that our customers' VPSes can benefit from the latest bug fixes and feature upgrades.
Like many things in Proxmox, the update / upgrade process can be done in a command line terminal window equally excellently as via the web GUI. Just open a terminal on the bare metal host server node and execute:
# apt-get update && apt-get dist-upgrade -y
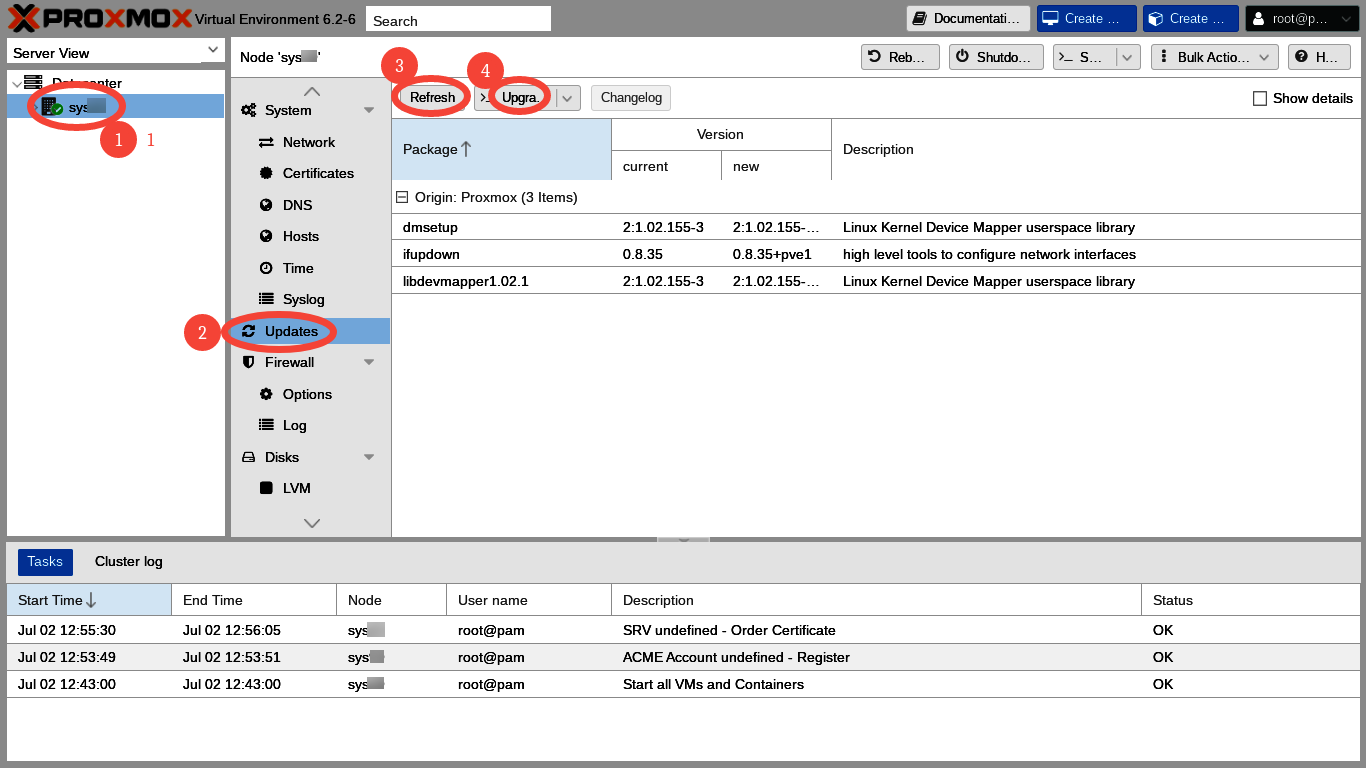
In the web GUI, update plus dist-upgrade is a four click process. We click on
- Our server's name in the extreme left Server View column,
- "Updates" in the left column menu of the main panel,
- "Refresh" on the top menu of the main panel, and
- "Upgrade" on the top menu of the main panel.
"Refresh" on the top menu of the main panel launches a Task Window which runs apt-get update
"Upgrade" on the top menu of the main panel launches a command line terminal window which runs apt-get dist-upgrade.
Sometimes, following an upgrade, we are told to run
# apt autoremove
to take away a few old packages which no longer are needed. Also, I like to
# reboot
Rebooting may not be necessary after every upgrade, but I enjoy knowing that my server can reboot successfully.
Additional ssh and web GUI security considerations
Here are some additional security steps which we might consider. All these additional security steps have advantages and disadvantages, so each of us has to decide how best to proceed on each of our individual servers.
The first additional suggestion is to change the root password originally supplied by OVH. Most everyone would choose to do this. Additionally, we might consider disabling ssh password login entirely.
Another possibility is to change the ssh port from 22 to some high number. An alternative or further possible step is to use port knocking. An advantage of these is that the logs suddenly get very quiet, since most of script kiddie attackers do not pursue ssh after the port changes. A disadvantage is that many software packages and services assume ssh operates on port 22.
The ability to assume that ssh will be on port 22 is, after all, the purpose of having standard ports. Therefore, if we install port knocking or change the ssh port, some other things will break. For example, I no longer seem to be able to access my servers via the Intelligent Platform Management Interface (IPMI) console after changing the ssh port. Running multiple Proxmox servers from one server's web GUI might also break.
Yet another possible postinstall security step could be installing fail2ban. The default Debian fail2ban install protects ssh but requires additional configuration to protect the Proxmox web GUI. The default install also may require additional configuration to work with the Proxmox firewall. Here, where access to our server is limited to single IP addresses by our firewall ACCESS rules, fail2ban may be less necessary or even unneeded.
Conclusion
Following our successful Proxmox install in part one of this series and our successful postinstall configuration here in part two, we have reached the point where we can use Proxmox to create the VPSes for which our customers are eagerly waiting!
In the next post we will download an operating system template and then use the newly downloaded template to create our first VPS with Proxmox at SoYouStart!


Comments
Excellent write up, thank you for spending time on this!
https://inceptionhosting.com
Please do not use the PM system here for Inception Hosting support issues.
Hello @Not_Oles , thx for the guide, just one question... could you elaborate on how to add a domain to dedicated server? Thanks.
You go to a domain registrar, such as Namecheap. At the registrar you buy the domain name and also set up the Domain Name System ("DNS") to point the domain name at the IP address supplied by the server rental company when you rented the server.
Many server rental companies will offer to sell you a domain name in addition to renting you the server. Many people prefer to avoid "keeping all their eggs in one basket," so they use a registrar other than their server rental company. Make it easier when the time comes to change either the server rental company or the domain registrar.
There are many variations on all this. Good luck!
MetalVPS
Hello @Not_Oles and thank you very much for your tutorial. I already have a SYS server with vmware and I'm ready to rent another one, this time with Proxmox VE6. Anyway, I read at their options in server essential and it seems Proxmox VE6 is not supported (red X near it). Proxmox V5 seems to be supported. I asked to their ticketing assistance but they were not able to tell me more, just that their specifications excluding VE6.
So my questione is: did you find any kind of problem for VE6 continuing to use VE6 ?
Hi @slapshot
I just checked the Essential Servers page at SoYouStart. I clicked on details for the lowest price server, E3-SAT-1-16. On this server Proxmox 5 was listed as available (green checkmark), but -- exactly as you said -- there was a red x next to VE 6.
My servers are Xeon D-1521, and these seem no longer listed as available. The Control Panel reinstall dialogue on my servers still shows Proxmox VE 6 as one of the available choices.
Over the years I've been aware of what seemed to be differences in the autoinstall systems from one datacenter to another. It's tedious, but it might pay to look at servers in different datacenters.
Probably it's possible to install Proxmox by using the rescue system. I think that to install from Proxmox's iso one might need to set up VNC or into the rescue system.
Debian has non-graphical install media, so one perhaps could install Debian from the rescue system and then put Proxmox on top. I do not know what changes SYS makes in the autoinstalled Debian from "official" Debian, but any changes might adversely impact being able to run Proxmox.
I've installed OpenBSD from the rescue system, and I have to admit it worked great! But rescue system installs are tricky and time consuming. Not everybody's idea of fun, but, if you like that sort of stuff, it's excellent!
One thing I would recommend to anyone using any provider's autoinstaller is to check carefully what's actually installed against what you think should be installed. You might find stuff like different kernels and different networking set ups than what you were expecting.
Hope this helps!
MetalVPS
wow thank you @Not_Oles , very good advices. I will have a look. I'm trying to write their assistance but it's a sort of hole in the water